







Utility and foundation crews lose hours when an auger drive stalls in clay, walks off plumb in rock, or spins a bit that was never matched to the soil. Hole diameter, depth, and ground conditions drive torque demand; carrier weight and hydraulic flow decide whether the drive can actually deliver that torque. Spec the package from the ground up—soil and rock first, then drive, bit, and extensions—so pole and pier holes stay plumb the first time instead of becoming a clean-out and re-drill exercise.
This guide is a field checklist for matching excavator auger drives and bits to soil, rock, and utility pole specs. It is not a brand bake-off and not a substitute for geotechnical data or the utility’s hole and embedment standard. Treat published torque, flow, and carrier-class ranges as starting points you verify against the machine’s real auxiliary hydraulics and the hardest ground on the alignment.
Reading Soil and Rock Conditions Before You Pick a Drive
Walk the alignment with a probe, spade, or the project’s boring logs before you hang iron. Soft sand and loam favor higher speed and moderate torque; stiff clay and compacted fill demand more torque at lower speed so the bit cuts instead of polishing a glazed hole. Fractured rock and cemented layers need rock tooling and enough down-pressure and torque that the pilot and teeth fracture material instead of skating.
Moisture changes the job mid-day. Clay that drilled clean in the morning can ball on the flighting after a rain, raising torque and plugging the hole. Frost lenses and undocumented fill are common on urban ROW work—budget a rock or hard-soil bit even when the surface looks like dirt. If the utility spec calls for a minimum diameter and embedment in undisturbed material, confirm you can reach that depth without cooking the drive in a diameter the carrier cannot support.
Depth multiplies friction. Friction on the flighting and stem weight add real load as holes go deeper for poles and piers. A drive that feels comfortable at four feet may stall at eight in the same soil. Plan spoil handling and extensions before you commit to a diameter that only works on paper for shallow fence posts.
Torque, Flow, and Carrier Weight Limits That Protect the Machine
Torque at the bit—not catalog horsepower—cuts the hole. Excavator auger drives for compact through large carriers commonly span wide torque bands, but the drive only reaches its rating if the excavator supplies the required flow and pressure at the auxiliary circuit under load. Read the carrier’s actual aux spec, not the brochure maximum, and match the drive’s operating flow window to that output.
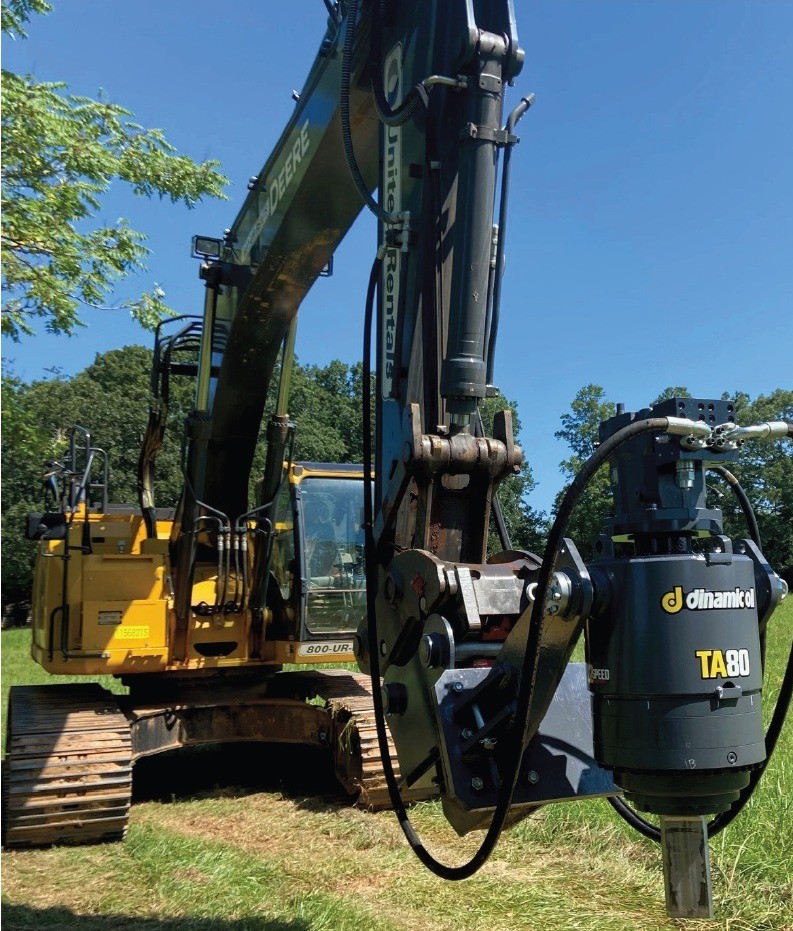
Carrier weight and stability matter as much as hydraulics. High-torque drilling generates side load and reaction that the tracks and dozer blade have to resist, especially on uneven ROW pads. Manufacturers rate drives by excavator class bands—from roughly 1-metric-ton compact machines into large 70-metric-ton excavators for heavy anchoring and drilling—so the gearbox, mount, and torque path fit the machine. Oversizing the drive on a light carrier is a tip-over and hose-blow risk; undersizing it on a big machine just stalls in the first hard layer.
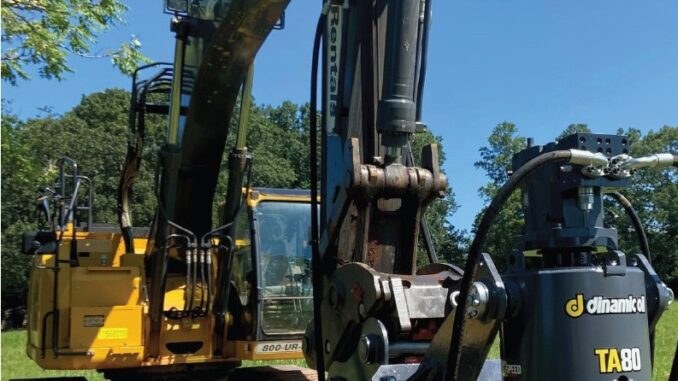
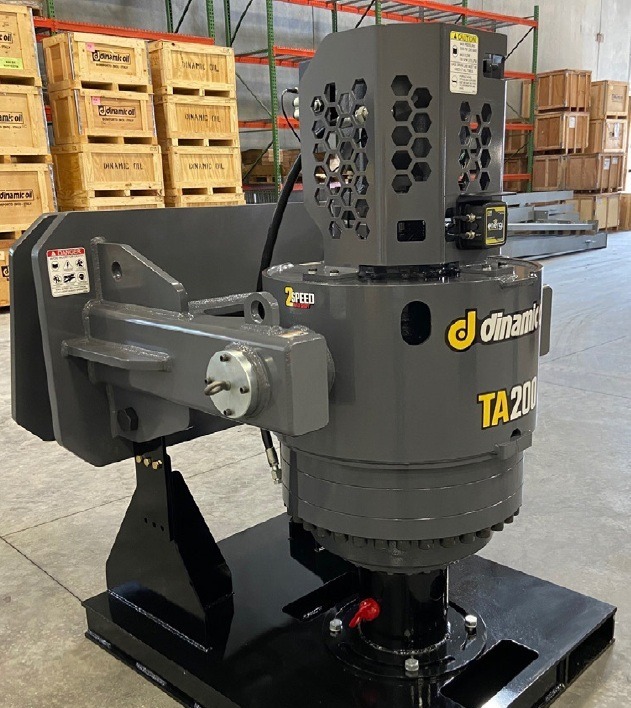
Mount style affects how the drive hangs and how extensions behave. Bail mounts and center mounts each have clearance and hose-routing implications; pick the style the manufacturer documents for your stick geometry. Two-speed drives help when the same crew drills soft overburden at higher speed, then shifts to high-torque mode for clay or fractured rock without swapping motors. Confirm the output shaft standard—hex drives are common in North American bit ecosystems—so bits and adapters share a torque path rated for the load.
Bit Styles for Dirt, Clay, and Fractured Rock
Dirt and clay bits with appropriate tooth or edge patterns move spoil up the flighting efficiently when the ground is cohesive or granular without rock. Hard-soil bits add tooth aggression and strength for compacted fills. Bullet-style and spiral rock bits put carbide or hardened teeth where they can fracture rock and cemented layers; using a dirt bit in rock rounds teeth and glazes the hole without advancing.
Diameter drives torque roughly with the square of bit size—so jumping from a 12-inch to an 18-inch hole is not a small step. Match diameter to the pole or pier detail with only the clearance the spec requires; oversized holes waste torque, spoil handling, and backfill. Pilot design matters in rock: a weak pilot wanders and oversize walls that fail plumb checks.
Inspect teeth and flighting every hole on abrasive sites. Replace rounded teeth before they force the operator to lean on down-pressure that walks the machine. Keep the bit matched to the day’s ground even if that means a mid-shift swap—spinning the wrong bit longer rarely finishes faster than changing iron once.
Extensions, Plumb Checks, and Spoil Handling on Tight ROWs
Extensions get you to embedment depth; they also amplify whip, misalignment, and spoil mess if the first stick of hole was not plumb. Start every hole with a deliberate plumb check at shallow depth before you add extension length. On tight rights-of-way, plan where spoil lands so it does not bury adjacent utilities, sidewalks, or the next hole location.
Pull and spin spoil deliberately instead of packing the hole. Clay that stays on the flighting should be cleared before the next bite; packed flights raise torque and can suck the bit. Spotters help on busy corridors where the operator cannot see both the hole and street traffic. Protect hose routing when the stick crowds poles, fences, and mirrors—auger days destroy unprotected lines at clamp points.
Dealers and attachment specialists that stock excavator auger drives, bits, and extensions—including Solaris Attachments—publish carrier-class ranges and bit options for dirt, clay, and rock so crews can match torque and tooling to the alignment. Use that documentation against the utility’s diameter and depth sheet, then verify plumb before you commit to full depth.
When a Rotating Pole Setter Beats a Standard Auger Cycle
A rotating pole setter earns its keep when the day’s bottleneck is not drilling the hole but setting and plumbing the pole afterward. On multi-pole runs, the ability to pick, rotate, and set without a second machine or a large labor crew can beat a pure auger-and-crane sequence—especially where truck access for a crane is limited.
It is the wrong primary tool when the ground still needs a proper rock or hard-soil drilling cycle the setter cannot finish efficiently. Many crews still drill with a matched auger drive and bit, then set with a dedicated setter or boom—whichever keeps the hole quality and the set quality both inside spec. Judge the tool by the full cycle: drill, clean, set, backfill—not by which attachment looks busiest on the trailer.
Train the crew on exclusion zones under suspended poles and on tag-line habits before the first set. A fast setter that skips plumb checks creates leaning poles that fail inspection. Keep auger tooling ready when the setter’s job is setting, not drilling through surprise rock.
End each day with a bite-and-spin check on the drive: bring the bit clear, confirm two-speed or relief behavior still feels normal, and note any new noise from the gearbox before mud hides a leak overnight. A drive that “almost stalled all afternoon” often needs flow or pressure diagnosis before the next alignment—not another day of forcing a mismatched bit.
Final Thoughts
Plumb holes start with reading the ground, then matching torque, flow, and carrier class to that ground—not with hanging the biggest drive on the trailer. Choose bit style for dirt, clay, or rock, add extensions only after the first stick is plumb, and bring a pole setter into the plan when setting—not drilling—is the bottleneck. Do that as a routine—and utility and pier crews spend the day making holes that pass inspection instead of re-drilling glazed, off-plumb cavities.