













Form ties are easy to treat as commodity wire until a wall bulges, a cone refuses to strip, or a gang sits an extra half day because someone field-cut the wrong inner rod. Ties and the small accessories around them—cones, walers plates, wing nuts, she-bolts, taper ties—are how fresh concrete pressure becomes a controlled load instead of a blowout. Choosing them for pressure capacity, finish requirements, and strip speed is a design decision that belongs on paper before the first panel is set.
This guide covers reading form-pressure expectations, picking taper vs she-bolt vs snap/coil styles, spacing to safe working load, and the finish and strip details that save the day after the pour.
Start With Pressure, Not With Whatever Is on the Truck
Lateral pressure from fresh concrete depends on unit weight, placement rate, concrete temperature, mixture chemistry, and height of fluid head. ACI 347 wall guidance gives formulas that increase pressure with faster placement and colder concrete, capped by full hydrostatic pressure and subject to stated minimums. Vibration liquefies concrete locally; the common formulas assume normal internal vibration. Exceeding the pour rate assumed when ties were spaced is a classic cause of form failure.
Before you order ties:
- Estimate design pressure (or use the engineer/form designer’s value) for the actual pour rate and temperature you expect—not last July’s number.
- Confirm the form system rating—plywood gang, modular aluminum, steel panel—so sheathing, studs, and walers match the tie plan.
- Select tie safe working load (SWL) with the manufacturer’s stated factor of safety (often on the order of 2:1 in forming catalogs) and never mix underrated hardware into a high-pressure wall.
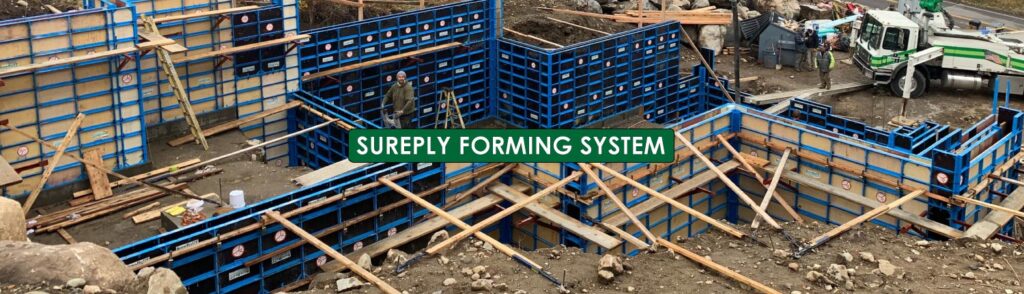
Spacing follows a simple demand check: tributary area times pressure must stay under the tie’s SWL, with walers and plates able to deliver that load into the form. Too much gap between double walers crushes lumber or bends washers, lets the form move outward, and traps cones—exactly the finish and strip headache crews blame on “bad ties.”
Tie Families: Snap, Coil, Taper, and She-Bolt
Different ties solve different reuse, finish, and capacity problems:
- Snap ties / flat ties—common on hand-set plywood walls; break-back or snap-off leaves a cone hole to patch. Fast to place; capacity and reuse differ from heavy gang systems.
- Coil ties / coil rods—threaded systems that pair with coil bolts and anchors; versatile for medium duty and job-cut lengths when used per rating.
- Taper ties—reusable through-ties pulled from the wall after strip; favored where specs want the tie entirely removed. Grease and proper wrenching speed strip; damaged threads scrap the reuse advantage.
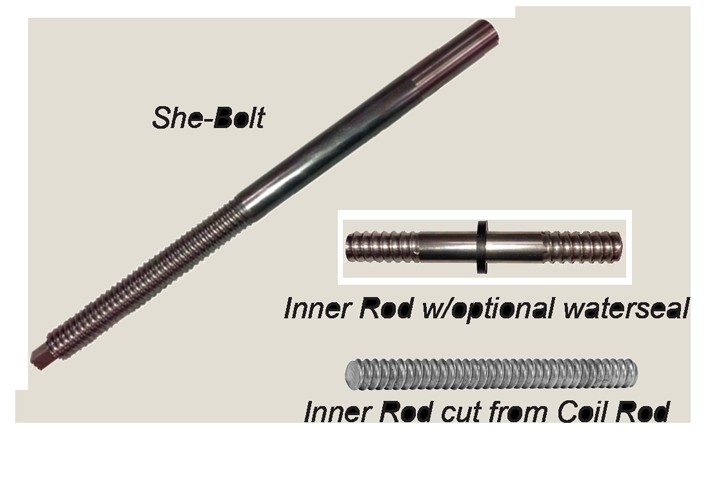
- She-bolts with inner rods—heavy-duty reusable outer hardware with expendable (or cut-to-length) inner rods for gangforms. High capacity for medium and heavy forming; waterseal options on inner rods address through-wall moisture paths when specified.
U.S. manufacturers of concrete forming accessories—including suppliers such as SureBuilt—publish SWL tables for she-bolts, wing nuts, and inner rods that must be read as a system. The assembly is only as strong as the weakest rated part, and wing-nut capacity can limit a larger she-bolt if you mismatch hardware.
Finish: Cones, Patch, and Architectural Expectations
Tie choice shows on the stripped face. Cone setback, patchability, and whether any hardware remains in the wall are finish decisions:
- Break-back / cone systems leave a consistent recess for mortar patch—specify cone size and patch mortar that match the architectural schedule.
- Through-ties removed completely (taper ties, some she-bolt setups) avoid embedded metal near the face but leave a hole that still needs detailing if appearance matters.
- Waterseal washers on inner rods matter on below-grade or water-retaining walls when the spec requires interrupting the capillary path along the tie.
Improper tie length and over-wide waler spacing let cones embed too deep or trap washers, turning a five-minute patch into a chisel job. Release agent on reusable tapers and she-bolts (waterproof grease where recommended) is finish insurance as much as strip speed—torn concrete around a stuck taper is a surface defect you created at install.
Strip Speed: Accessories Beats Field Fabrication
The fastest strip day was usually won at the purchasing stage. Factory inner rods cut to wall thickness, matching wing nuts and plates, and taper lengths selected for the gang depth beat torch-cut coil rod and mismatched nuts that seize under load. On reusable systems, inspect threads and replace worn she-bolts and hardware—catalogs explicitly warn that damaged parts must not return to the wall.
Small accessories that save hours:
- Correct waler plates and wing nuts sized to the bolt diameter so load spreads instead of crushing.
- Scaffold brackets, braces, and alignment accessories rated for the system instead of field-welded guesses.
- Plastic cones and patch kits staged on the strip crew’s cart so the wall is not waiting on a hardware-store run.
Field Controls That Keep Pressure, Finish, and Strip Aligned
Post the pour-rate limit next to the pump operator. Do not keep filling a wall while the bottom is still fully fluid if that was not the design assumption. Limit vibrator immersion depth habits that re-liquefy the full height. Use only correct-length ties on a given wall thickness—mixing lengths shifts load to the longer ties and can trap spreaders.
After strip, walk the wall: note any bulges (pressure or spacing problem), trapped cones (waler gap or length problem), and difficult taper/she-bolt removal (grease, damage, or concrete strength timing). Feed that into the next pour’s hardware list. Form ties are a system with the sheathing and walers; changing one without checking the others is how “we’ve always spaced them 2 foot on center” becomes a claim.
Reading a Catalog Line Without Getting Lost
Forming catalogs list diameter, length, SWL, and mating parts. Read across the row: a she-bolt length must suit gang depth plus waler stack-up; an inner rod must match wall thickness minus cone or setback details; a wing nut’s SWL must meet or exceed the load path you assume. Optional waterseals, flat washers, and heavy plates are not upsells when the wall is below grade or the waler is soft lumber. If the takeoff was done from a competitor’s part numbers, cross-reference capacities—thread pitch and SWL are not universal even when diameters look familiar.
On the job, quarantine damaged or unknown hardware. A mixed bucket of “ties that fit the hole” is how underrated parts enter a high-pressure wall. Train laborers that substituting a smaller wing nut to “make it snug” is a structural change, not a convenience.
Final Thoughts
Pressure charts, SWL tables, and cone details are not paperwork for someone else’s trailer—they are the difference between a wall that strips clean and a wall that owns your schedule. Walk the takeoff once with the superintendent and the form carpenter before panels go up.
Choosing concrete form ties and accessories for pressure, finish, and strip speed means starting from lateral pressure and safe working load, then picking a tie family that matches reuse and architectural needs, then buying the plates, nuts, cones, and inner rods that let the crew strip without chisels and torches. Taper and she-bolt systems earn their keep on gangs when threads are cared for and grease is applied; snap and coil systems still dominate lighter walls when spaced and patched correctly. The small hardware is not optional garnish—it is what turns a pressure calculation into a plumb, patchable wall and a strip day that ends on schedule.